
Understanding White Balance
For beginners in photography, the concept of white balance is an absolute must to understand. If you’re serious about upping your photography game, I would encourage you to learn these basic concepts that are the foundation of photography and how to adjust them manually.
Boom.
I know we’re going into this right away but my goal is not to drag out this blog any longer than it needs to be AND to keep things as simple as possible.
Now, there are a lot (A LOT) of great blogs and YouTube video explanations out there, some of which I’ll refer to throughout this article. However, my intent is simply to offer you another alternative explanation and not compete with these other ones.
You’ve gotta find what works for you and I have found that I learn the most with pictures and videos showing what is being explained. So, you’ll find an appropriate amount of both here.
I, myself, was a beginner not too long ago. Honestly, I feel like I still am since there are SO many concepts I’m still learning and trying to apply to improve the quality of my photos, but I do feel like I have enough experience under my metaphorical belt to help someone “younger” than me in photography, grasp some of these confusing concepts. White balance being one of them.
So, this will be the first of four blogs that will focus on simplifying the basics of photography as follows:
- What is white balance?
- What is aperture?
- What is shutter speed?
- What is ISO?
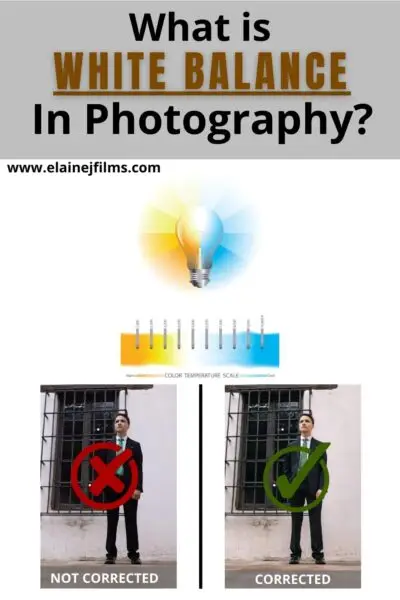
PINTEREST PIN
This post may contain affiliate links, which means I’ll receive a commission if you purchase through my links, at no extra cost to you. Please read full disclosure for more information.
Summary Preview
To summarize the structure of this blog, we will start off by defining what white balance is. Then delve into the concepts of color temperature and then focus on how to actually do white balance corrections on set or, (in my case) in the field. I.e. while you’re out doing a shoot.
We’ll discuss the different options for setting your white balance, and what scenes are best for which options. We’ll touch a tad on how to do white balance corrections in post, in your editing software and then wrap everything up with some general tips for the best practice of white balance corrections.
This is a very meaty blog so I suggest taking your time to read this one but I do believe it’ll be worth your time.
And now, without further ado, let’s get this party started.
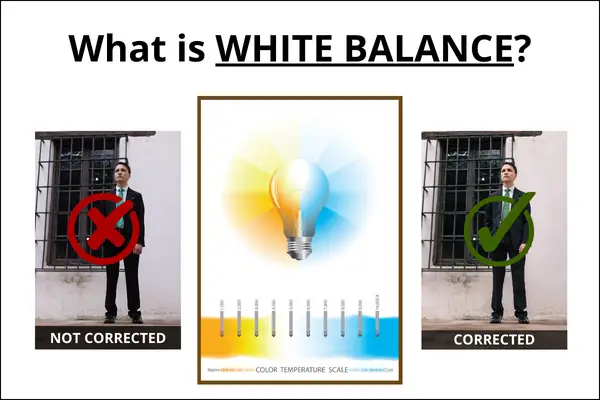
White Balance: what is it?
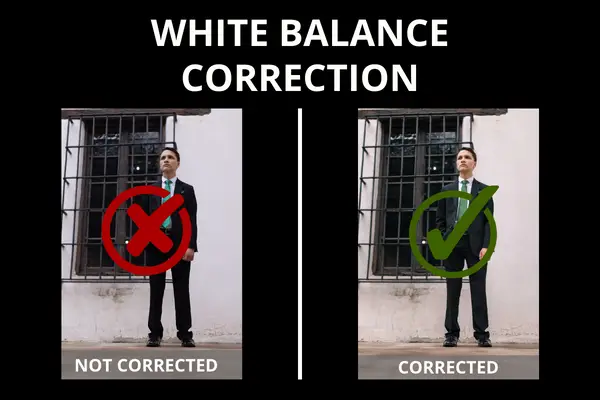
For the sake of simplicity, white balance is the act of adjusting the colors in your image so white colors appear white. In essence, you make white balance adjustment changes that balance the colors in your image so white appears to be white.
This is important because whether you’re actively shooting photos or editing them, the entire image can look off and unnatural if the white balance is not properly set. Having the correct white balance sets the standard of accurate color for all the other colors in your images.
To apply manual white balance adjustments, you first need to understand the concept of color temperature.
The Concept of Color Temperature
In layman’s terms, and my personal paraphrasing, color temperature is the theorized temperature of color measured in degrees Kelvin (K).
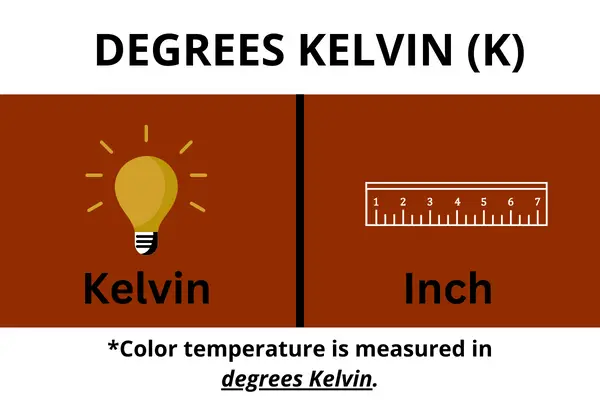
Think of Kelvin as a measurement unit. Just like Americans understand 12 inches equals 1 foot, a Kelvin value is a similar property but specifically for color temperature.
The Kelvin scale is the range of Kelvin degrees that spans the spectrum of the different color temperatures.
Now these color temperatures correlate with different colors to give what professional photographers know as different color temperatures.
Just a reminder before we move on… this is my personal simplified breakdown of this concept. If you desire the legit, scientifical, physics explanation, you can read this article by Olympus-LifeScience. I thought their explanation was great.
Now, you’re likely wondering, “Uh ok, what do you mean by different colors exactly?”
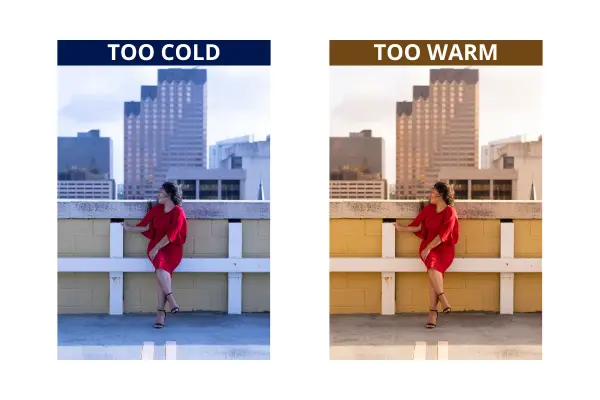
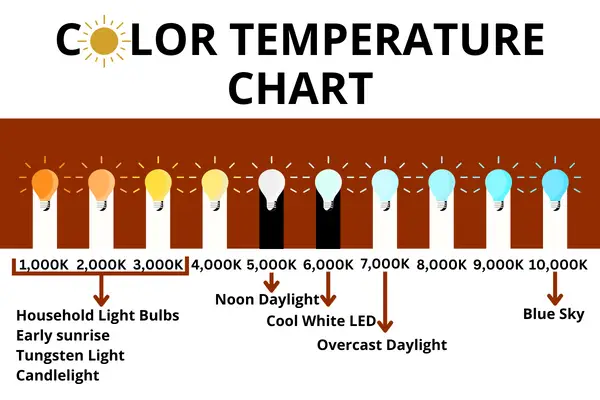
On a scale from 1,000 to 10,000 K, the different colors range on a spectrum from orange to blue.
In my beginning stages of photography, I remembered this easily after I saw visual examples of this. So, I have an image example of the range of color temperatures, their associated colors and Kelvin measurements below.
Now, let’s discuss this a little more in-depth.
This will give you the background foundation to build your knowledge moving forward with manual white balance adjustment.
First, keep in mind that the standard for a neutral color temperature is associated with the sunlight at noon. This measures in at 5200-6000 K.
The comparison light examples that correlate with the associated kelvin temperature are as follows:
- Candle – Orange – 1,000-2,000 K
- Sunlight – White – 5,200-6,000 K
- Heavily Overcast Sky – Deep Blue – 9,000-10,000 K
*To simplify, think from lowest to highest, as in 1,000 to 10,000 K. Now, the associated colors from lowest to highest is a spectrum from orange to blue with white being in the middle.
Other terms and their associated temperatures to be familiar with are incandescent lights and fluorescent lights.
Lights in your home, for example, are usually tungsten lights which are incandescent bulbs with a tungsten filament. This is what gives that warm yellow or orange glow to the insides of home.
I’d say that now, a lot of newer homes are going to that bright white light effect with canned lights. BUT tungsten lighting is so common, it’s probably going to become old hat to you really quick as you delve into photography inside of facilities, like venues, hotels, restaurants, etc. As for incandescent lights, they are around 3,200 K.

Fluorescent lighting is a little more tricky in that their color temperature ranges from about 2,700 K to 6,500 K. With advancements now adays, these can give off a soft light similar to incandescent bulbs but also can go as bright as natural daylight.
There is no hard and fast rule here.
This further supports the importance of knowing how to manually adjust your white balance because relying on your camera setting for automatic white balance will not always be accurate.
How to DO White Balance
All right, dear reader. We are finally at the fun part of this whole blog.
I’m not sure if I’m being sarcastic or not. Insert a smiley emoji here. Yes, I wrote that out on purpose. No AI-written blog here, folks.
No, but seriously, I don’t mind adjusting white balance. I prefer the control because then I have no one else to blame later when I’m in the virtual post-editing room.
Now that we understand (at least, I hope you do) the concept of why white balance is important and the foundation of color temperature, we can use that knowledge to understand how white balance works.
In layman’s terms, white balance is the process of balancing the color temperature in your image so white appears white.
Yes, I know. This seems so simple to understand but it’s actually harder to do.
To make the application of this easier, keep in mind that NOT all whites are created equal.
You should know this if you’ve ever tried to pick a white paint color for a room. There are so many variations of white that actually can be a stark contrast when compared to each other.
This is similar to reality.
Whites that you and I see, can not only be different but they can also have a tint to it. Hence white lights in a home appearing yellow tinged versus white snow appearing blue tinged or even gray tinged.
Now, here’s the key.
In order to balance the whites in your image in camera to a neutral color temperature as opposed to leaning towards one color temperature (orange) versus another (blue), you will need to adjust your settings to balance it out.
This, my friends, is white balancing.
So, exactly how do we do this in digital photography?
I’m glad you asked that question.
Manual White Balance Adjustments
First and foremost, make sure your camera is using raw files.
Raw files give you the depth of control with your colors in post, i.e. editing, to further correct your white balance for the perfect color for your image. JPEG takes that control away from you, and even though it may seem more convenient, is the worst way to go in your developing photography career.
After your camera raw mode is confirmed, you’ll need to go to your camera’s white balance option in the menu settings. For most, if not all cameras, you should be able to easily access this by locating the K icon in the menu.
Select this, and you’ll be able to increase or lower the K value to the appropriate level to make the whites in your image more of the neutral white like that of direct sunlight versus a blue or orange white.
Personally, I don’t think you need to memorize the entire K scale because you can just adjust your K camera manual settings in real-time to see how the color changes, but you do need to note that while the K scale in camera appears to be opposite of the scale of the color temperature this is not exactly true.
What happens is that the camera’s view of the color white has to be adjusted to match the white in real life. Therefore, we use the in-camera’s K scale to shift the in-camera appearance of white more towards blue or orange to be more consistent with reality.
However.
Because our human eye adjusts colors in real-time versus a camera’s manual settings, and we’re comparing colors from inside to outside, this can get confusing when trying to understand why the scale in camera appears opposite. I honestly wouldn’t even try to fully understand why and how our camera’s white balance settings are the way they are.
To deviate quickly, one article I read in my research explained that the camera’s settings for K are made to correlate with the psychological values of warm and cool. Meaning, when you think of cool, you think of blue. When you think of warm, you think orange or red. So, the higher the “temperature” is, we naturally think the more warm and more red (or orange) it is. The opposite being true for cooler temperatures.
The thing is, we can get into the nitty gritty of why this is or is not exactly accurate but. Do NOT get bogged down on this! You don’t need to.
Just know, the following steps are what you need to know.
For the sake of simplicity, just remember these simple steps:

And with that, ladies and gentlemen, you’ve set your white balance.
What you will note in doing this is that decreasing your K in camera usually occurs when you’re inside a home, venue or facility. And while this to us as human beings, looks like we’re moving towards a “bluer” color, it is consistent with the tungsten or incandescent color temperature.
Versus when you’re outside in bright or cloudy daylight, you’re usually increasing your K, which is usually consistent with the same (or similar) correlation of the color temperature scale.
Where WB Gets Confusing
Here’s why manual adjustments are the secret sauce to professional photography life.
Different light sources can combine to give a mixed lighting scene which is difficult for your camera’s auto settings to correctly balance for.
What you want to avoid is an incorrect white balance. This can create an unnatural appearance to your image because it will affect all the colors in your image and not just the whites.
Even though modern digital cameras come with preset auto settings for different lighting conditions, it will struggle with simultaneous different temperatures of light.
Knowing how to bypass that auto mode and set your Kelvin manually or create a custom setting manually for your white balance will give you the control on what looks best in any setting with different light sources.
Preset Camera WB Modes
Now, while I do not ever use my camera’s auto white balance settings or preset white balance settings, it doesn’t hurt to have basic knowledge of their function.
So, let’s discuss these real quick.
The different white balance options will vary by camera but are generally the same. What you will find is that these presets are settings created in advance for ease of use in situations where the light can be matched to a generalized category.
The standard settings include Daylight, Shade, Cloudy, Tungsten light, and White Fluorescent light.
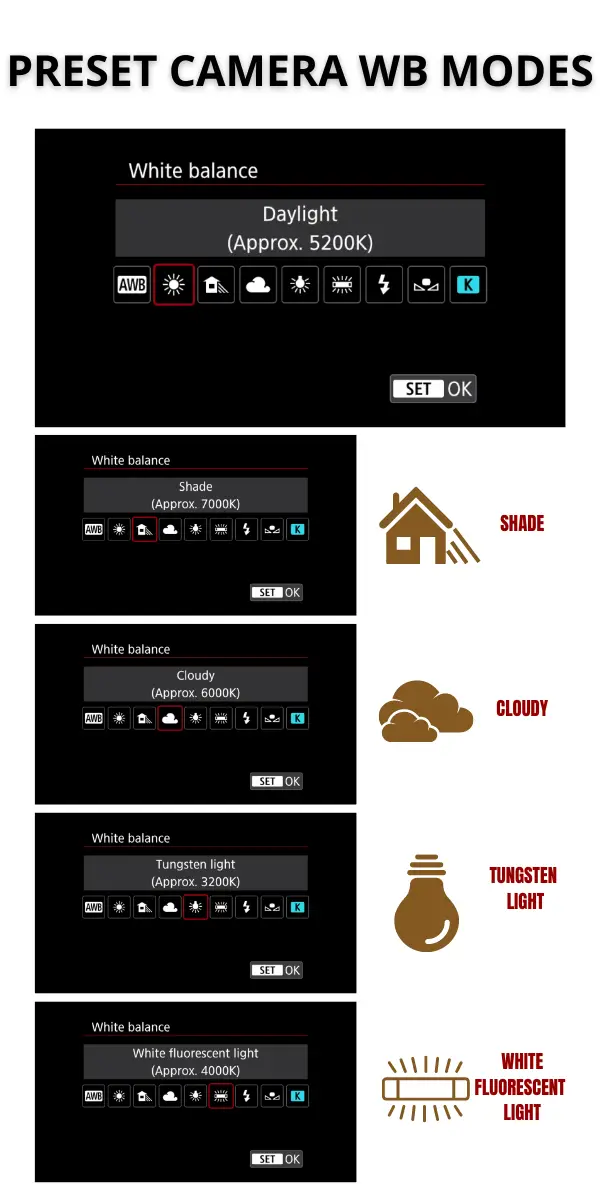
If you’re in a surrounding where one of these descriptions fit as the predominant lighting, you can use that setting to set your white balance for you.
For example, if you’re doing an outside photoshoot and it’s an overcast skies type of day, set your camera to the cloudy day mode and boom! You don’t have to worry about adjusting the K manually.
There are many professional photographers out there, like Peter McKinnon for example, who preach manual settings and raw format. BUT, at the same, will also say they do use the cloudy setting for an automatic white balance option in a lighting situation where its cloudy.
There is nothing wrong with that. You do what is best for YOU to obtain the most color correct image you can.
Custom White Balance
Then there’s this “custom” white balance.
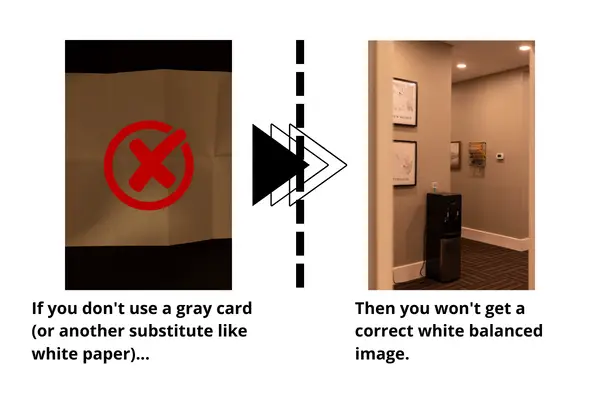
In this type of setting, photographers use a gray card to create a custom white balance in different lighting situations.
Now, to be completely honest, I had never used this feature until this blog because I just manually set the K every time for my lighting situations. I love doing that because I can change my Kelvin on a whim and don’t have to worry about any other extra steps.
However, theoretically, I could see the advantage of this skillset, if used the correct way.
Now, to be clear, gray versus grey card, means the same thing. For the purposes of this article anyway. I get that there are different ways to spell “gray” but let’s not get hung up there.
What you’re wondering is, how does this work?
We’ve all seen the photos of or seen photographers in person, usually those using soft box lighting or are in photography studios, pull out this placard-looking equipment with different colored boxes on it.

This is a calibrate colorchecker tool that allows the photographer to create a custom white balance in a difficult lighting situation.
Well, similarly, there is what is called a grey card which is believed to be the best way to obtain the perfect white balance for neutral colors as well as exposure.

This grey card is actually 18% gray, hence the term “gray card” or “grey card.” Cameras will “read” this gray card and save a custom white balance in the setting the gray card image has been photographed in.
For most cameras this custom white balance setting is set by the photographer taking a picture of this gray card with the entire card filling the lens screen as possible. Then within the menu, set this image to the the CUSTOM WHITE BALANCE option.
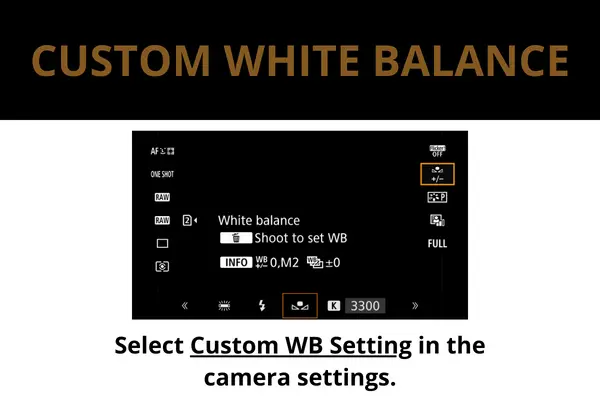
Then select the custom white balance option when choosing how to set your white balance, and boom! The images you take will be set to that custom preset white balance.
Now, in preparing for this blog, I’ve tested this out and have found it to be amazing. I’ll show you an example of two photos I took with one set with using just a white paper as my “gray card” to the custom white balance option, and the other, on a manually set Kelvin.

Now, for the purposes of this blog, I had my Kelvin cranked up inside a building with tungsten lighting. Of course, it’s going to come out on the warm side, but I could easily self-correct this by manually adjusting the Kelvins.
The advantages of using a white balance card is having the ability to set your custom white balance once, and just shoot. However, the disadvantage is when that lighting changes in any way, then you’ll need to create another custom white balance setting to reset it to a more appropriate white balance.
This can be super helpful in several situations, like, for example, where there isn’t a white or other type of neutral color to compare and manually set your white balance to. Having a gray card will take the guesswork out of your white balance settings.
We could go on and on about where this could be useful or not useful, but for the sake of this blog, a general overview will suffice.
Personally, in my experience, most of the photographers I know do not use this regularly but that doesn’t mean it still has value and relevance in today’s photography world.
Perhaps I’ll write another blog focused on just that. We’ll see. Let me know. Leave a comment!
White Balance in Post-Editing
Before we move on to the tips, I want to briefly touch on white balance corrections in post.
After you’ve completed your photoshoot and get back to your supposed office, I mean, nowadays, your office is usually where ever your laptop is… but, I digress.
Anywho, when you’ve opened up your editing software of choice, mine being Lightroom Classic (you can read why here), one of your first steps to begin editing your footage is to perform any white balance corrections.
Now, I’m bypassing all the basic steps of saving your footage, importing it, culling, etc. For the sake of being focused, let’s just say that’s all understood that happens before editing begins.
But white balance correction is generally the same from software to software. You have the option of using an automatic white balance correction tool or manually correcting the white balance yourself.
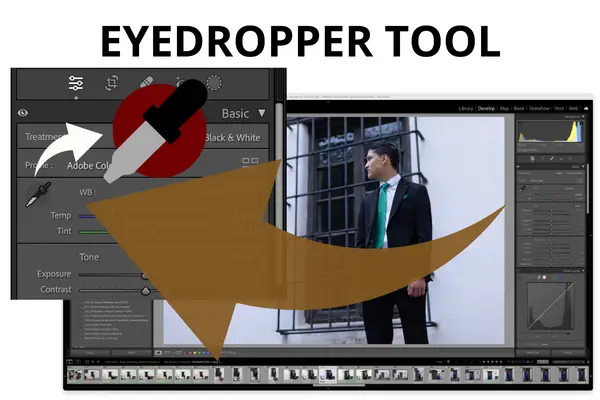
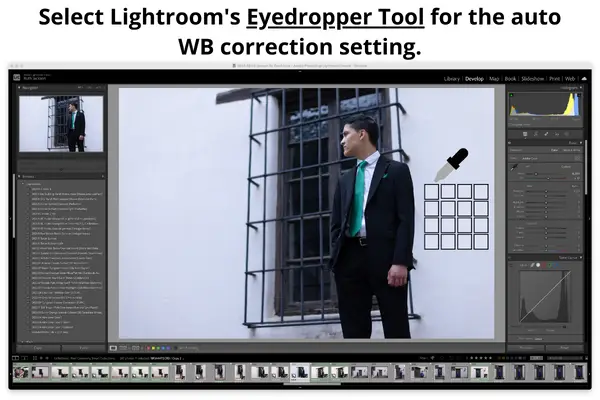
Within in Lightroom, you can click the eyedropper tool which selects it and then use it to click on a neutral color within your uploaded image. This will automatically correct your white balance by automatically adjusting the temperature and tint to give a more natural look to the colors in your image, based off the neutral color selection you picked.

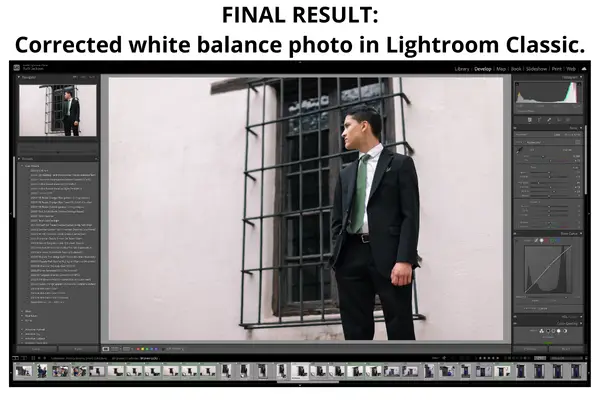
However, you can also manually correct this by just dragging the sliders in the WB section and adjusting the white things in your image to be a true white to your eye. This is subjective, i.e. dependent on the editor’s perspective of how the whites in the image appear the best white, but by doing this, this corrects the colors for everything else.
Personally, I use a combination of both. Sometimes I will try the automatic mode for white balance correction in the software and find it to show accurate results. Sometimes, it doesn’t appear as accurate and so I’ll adjust manually to obtain the best results possible according to my eye.
But you do you, boo.
As long as you edit colors in the most accurate way possible for your brand, style and best look, using one or the other, or both methods is totally your call.
Now let’s get to some overall tips!
Tips
#1 The best white balance at any point and time is the right white balance for a particular light setting.
*To sum it up in a short phrase, adjust your white balance for different lighting situations.
#2 If that light changes, but the setting remains the same, adjust your white balance. If the setting changes, but the lighting remains the same, doublecheck your white balance to see if it needs adjustment. It might, depending on the reflection of light in this different setting.
#3 Learn how to manually adjust your white balance with the Kelvin option! This is always a reliable option versus relying on preset white balance options or even custom white balance. Unless you have broken fingers, this will never fail you.
#4 Practice makes permanent! Manual white balance adjustments are incredibly easy to learn and apply. Just practice, practice, practice and it’ll become second nature to you.
#5 Have a basic understanding of all the other white balance mode and options available to you. Being a well-rounded photographer will help your career expand in areas you would’ve never imagined.
#6 Know where to find your camera’s white balance setting! The easier and quicker you can access your white balance menu, the better off you’ll be in any situation.
Understanding what White Balance is in Photography...
is fundamental to excelling in photography.
Especially those starting out, I encourage you to do your due diligence and learn this concept. It is NOT as hard as it seems!
You can check out this awesome article by SLR Lounge for a great breakdown of white balance and watch this video by Adorama below as well.
Shortcuts like using the preset white balance options will get you by, but to start creating unique images that change the game, manual settings are going to be key.
As basic as it may seem, this is the single most important aspect of beginner photography that I am grateful I learned first. And I’m SURE you will feel the same.
And if you’re retracing your steps to learn the ins and outs of white balance, I applaud you. Seriously. One can never know too much and it is never too late to return back and hone your understanding of the basics.
Just remember… this is the beginning. Make sure to stay tuned for blogs on aperture, shutter speed and ISO!
