
How to Cull Photos
To become a professional photographer there are certain editing methods you must master at the very beginning of your endeavor.
Because, quite simply if you don’t, you will waste a lot of time in developing and growing your business.
If you’ve just started in photography and have plans of pursuing this further into a full-time career, you may or may not have heard the term “workflow.” There are editing workflow processes that every professional photographer develops that enables them to do what they do well.
One of those focuses around the culling process.
This post may contain affiliate links, which means I’ll receive a commission if you purchase through my links, at no extra cost to you. Please read full disclosure for more information.
Preview Summary
In this blog, we are going to get into the different ways to sort your photos, examples of how to do so and recommendations to devise your own culling system.
If you’ve read any of my tutorial blogs, you’ll note that I’m doing an Adobe Lightroom Classic tutorials series. While this blog post focuses on more than Lightroom, I will be getting into my culling methods within Lightroom later on. You may find this beneficial if you have plans to use Lightroom in the future.
Regardless, I’m sure you’ll find that the more education and tips you learn from anyone regarding any photo editing software will simply better you as a professional in your field.
So read on, Lightroom fan or not!
First of all, what is culling?
Let’s break down what culling is.
Truth be told, even if you don’t know what it means but you’ve edited any photos at all then you HAVE done culling. You just might need some improvement to your photo culling process to help you be more efficient.
When I first started out in photography, I had no idea that what I was doing as part of my editing process was called “culling.” But I would hear other photographers use the term on social media and would think, what are they talking about?
Culling is simply the process of sorting out your best images for editing.
Why is culling important?
Culling is important because it sets the foundation for the rest of your editing processes.
If you do this prep work right it will make everything else that much easier.
You see, everyone has a way of picking which photos are their best shots and which are their worst. What makes the difference is if that culling process is efficient or not.
So let’s talk about the different culling methods to help make YOU a better productive photographer.
Different culling methods
As we discuss these different ways, I’m going to tell you what I specifically do in my editing work flow when it comes my culling workflow.
Of course, the very first step is to simply upload your photo session footage from your memory cards to your editing software. For Lightroom Classic, you can watch this video on how I import my RAW footage into a new Lightroom catalog.
My suggestion is to always save a copy of your RAW files for future reference and upload a separate copy to your editing software. You never know when you may need to use your RAW footage. And if something happens to the software, you have a back-up copy available.
Photo review passes
For most professional photographers, they do a number of “passes” through their footage to end up with the final selection of the best images to edit.
Usually this is two or more passes.
The first pass is a general weeding-out of the better images. The second (or more) pass entails a closer look at the images from this first step to select the best of the best to reserve for editing.
There are various ways to select your photos that we will discuss quickly (there’s easy to learn).
My advice is to read through all the different ways and pick the best ways for YOU. Any other way to cull images might cost you too much time and decrease the efficacy of your workflow.
All the Ways to Cull and Keyboard Shortcuts
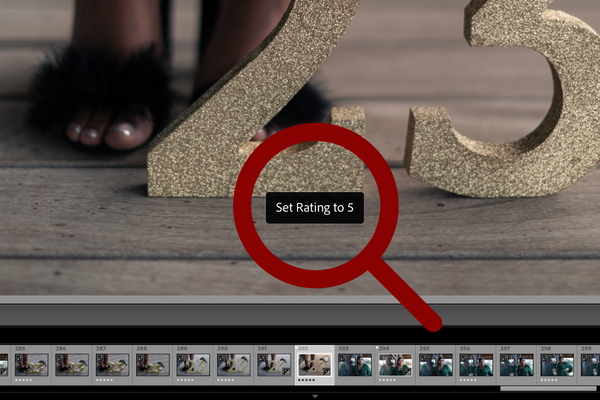
Star Ratings
This is a great way to sort bad images, similar images and even rejected images in your review of your footage.
Within Lightroom, you’ll use your number keys from 1 to 5 to rate your photos. You determine the meaning of those star ratings though.
For example, for me, 5 is the best and 1 is the worst and I already know in my mind that I will NOT even consider anything rated below a 4.
The keyboard shortcut for this is simply pressing a number between 1-5 and that many stars will be applied to your image.
Once you’ve done this a few times, you’ll be able to fly through your photos with star ratings.
Flagging images
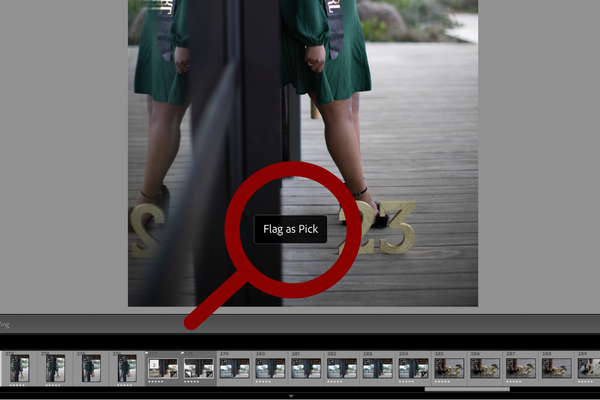
Another great way to sort through your footage, pulling specific images to edit later is through flagging.
You can flag certain photos out of all your photos, leaving out unnecessary images and a lower number of photos to edit for later.
The keyboard shortcut for this is pressing the “P” key to “flag” an image and the “U” key to unflag an image.
Color Ratings
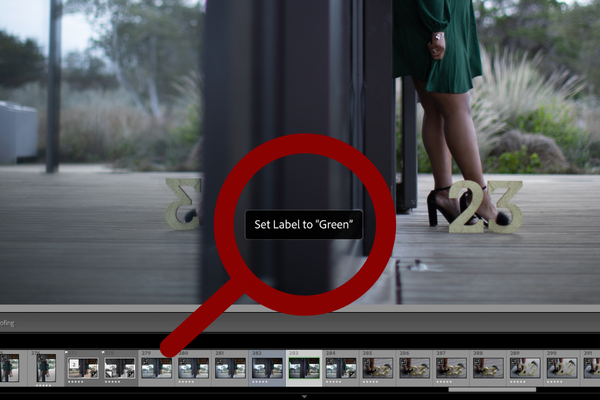
You can also use color labels to sort your images. For example, red to reject, green as a save or keep and yellow to indicate potential.
The keyboard shortcut for these in Lightroom Classic are the number keys from 6 through 9.
- 6 = Red
- 7 = Yellow
- 8 = Green
- 9 = Blue
My Process
#1 Saving footage from the memory disks
The first time I set aside to start culling my images, I make sure to save everything from my memory disks onto my external hard drive which is a LaCie RAID 16 terabyte.
It is so important to make sure you have a copy of your original footage saved before you start culling.
#2 Create a new catalog and import RAW images
Then I create a new catalog specific to this new photo session and import all the RAW footage in.
#3 The first pass
Once that’s imported, I’ll set aside time to look through my photos quickly and star those that I can immediately reject and those that immediately stand out to me as the keepers. This is my first pass through the footage. 5-star images for me are the best of the best, 1-star images are the worst.
Depending on the number of images, this may take me a few days to do as opposed to doing it in one sitting.
I won’t get into all the details on my workflow in this blog but I will get into specific detail in the photography course I’ll launch at the end of next year, 2023. So if you plan on sticking around for that, do sign up for my newsletter. You’ll be the first to know when that launches and have the first opportunity for any associated discounts.
#4 The second look
The second time through, I’ll sort through the image selection from the first pass and do my rejection versus selection process. This is my ultimate step in my final selection of what I consider to be the best photos to set aside for editing. I do this by flagging these photos.
To be completely honest though, my second look may consist of a second and third look. Sometimes I like to review my 4-star ratings just to be sure I didn’t miss anything and though this may take a little more time, with practice I’m able to fly through this process. We’ll get to some tips on how to do that shortly.
From there, I’m ready to edit my flagged photos. And boom, my whole process for culling is complete.
Artificial Intelligence
Now all of the methods we discussed above is manual culling.
This is you, as the photographer sorting through a bunch of photos to reject similar shots and duplicate images to leave a markedly reduced number of fewer images left to begin editing.
Another way to maximize the efficiency of your process of culling is by using artificial intelligence (also known as AI).
Let’s talk about two popular AI softwares.
Narrative Select
This image culling software is great for photographers looking to keep costs low and increase their productivity at the same time.
There is a free version (Select Free) and pro version (Select Pro) which is $15 a month (at the time that this blog is being written).
The beauty of this software is that it eliminates, at the VERY LEAST, your first pass in the initial cull process.
You import your RAW images into Narrative Select, and it sorts through your shots immediately in several ways. It sorts through those shots that are actually in focus shots, taking the guesswork out of if it is or is not in focus. It can do this whether a subject is in focus, soft focus or sharp focus and if the subjects’ eyes are open or closed.
It also has a close-up panel feature that provides close-ups of all your subjects face. But it also allows you to zoom in to the most important face to review with the touch of your spacebar.
Then there is the image assessments feature that signifies to you with an exclamation point that certain images are some of your worst from the session and essentially leaves this out of your overall review. The software takes it upon itself to indicate these as unwanted images allowing you to do a fast cull that you wouldn’t be able to do on your own for large session collections.
Adobe Bridge
Now let’s talk about Adobe Bridge.
The benefit of this software is that it is free. However, it was a companion program specifically for Photoshop but reportedly can work with any of the Adobe Creative Cloud apps.

It is known as a digital asset manager or media manager and serves as a way to sort and organize your footage, files and data in general.
Now, personally, I do not use Adobe Bridge. From what I understand, Lightroom was made to integrate some features of Adobe Bridge to enhance the capabilities of Lightroom as a standalone software for photography editing.
I will always do my best to be honest with you in these blog posts. So, what you are reading is my general understanding concluded from researching on Adobe Bridge in the first place.
I will link some of these sources that I reviewed to educate myself about Adobe Bridge. From Adobe itself and then from Photoshop Essentials is a great article to read.
In short, Adobe Bridge is a file browser that is not limited to Photoshop and does allow you to make edits to images through-out folders accessible via your hard drive. It does this by using Adobe Camera RAW. Essentially, you can open your RAW images within Adobe Camera Raw directly from Adobe Bridge and make your edits there.
As a file management system, Adobe Bridge allows you to display thumbnail previews of all your images in a folder, which are also fully customizable. Meaning you can modify your previews to some different type of previews look that is a certain size, that is better to view.
You can change the sort order of the images by file name, file type, and size for starters. You can preview images in the Preview panel, or look at a full screen size by using its Full Screen Preview mode.
There is also an image review mode that allows you to sort through images. Similar to Lightroom, you can sort by applying star ratings, labeling as “reject” and even using color labels. Filtering images by creating collections is an amazing feature of Adobe Bridge as it can group images across different folders and even different hard drives.
That is INSANE.
Then there is its direct access to Photoshop.
Again, I use Photoshop minimally. My main go-to editing software is Lightroom. But there are those that find Adobe Bridge’s direct connection to Adobe Photoshop to be an amazing feature to expedite their culling and thus editing workflow within Adobe Photoshop.
Do remember that this is its own separate program and you’ll need to download and install this program before using it with Photoshop. Of course, the way to do this is to invest in Adobe’s Creative Cloud which gives you access to all of their programs within one subscription.
Is it worth it?
That depends on the user’s preferences.
For me, I do not use Photoshop enough to warrant spending time in learning Adobe Bridge. BUT, given what I’ve read on this software, I would delve into it if I were someone like Peter McKinnon who is a beast at utilizing both Lightroom and Photoshop. He started out in Photoshop versus yours truly starting out in Lightroom.
Since Lightroom meets my needs and what little I need to do in Photoshop can be done by accessing it through Lightroom first, Adobe Bridge is not a program I feel necessary to explore in learning for myself right now.
You’ll be the first to know if that changes though. And I may have to look further into this to truly see what it could do for my editing workflows.
Culling Tips
As we come to a close, let’s discuss some top culling tips to help you speed up your turnaround time to getting final edited images out to your clients.

The first important step...
in your culling process is to create a separate folder for the new session you’re about to cull. Place a copy of all your RAW images into this folder, which will be the same folder you’ll store the catalog and final exported images.
Sort your images within culling sessions,
for a large collection of images.
Meaning, it may take you several days to cull through everything properly. This is okay because you want to approach your images with a fresh and ready mind. Sorting through images when you’re tired, exhausted, frustrated or in a rush can cause you to second-guess yourself later on or miss a potentially great photo for editing later on.
Develop a system for culling your images.
And within Lightroom, do this within the develop module or use the loupe view so you can clearly see the photos you’re sorting through. Looking at the full-size image and using the arrow keys to go back and forth through images will decrease the amount of time you spend on this tedious task.
This will take time but once you develop a system, you’ll find that a tedious task has suddenly become seamless. My process is doing at least 2 passes with my first pass using a star rating system, and second pass, a flagged system through my 5-star images.
Read and see about other professional photographer’s culling systems.
This is always a good idea. You can do this by reading other blog posts like mine, or searching YouTube. You may find great tips and methods from others that you can use to improve your process.
How to Cull Photos
is a necessary process for the editing photos part of a photographer and photography business life.
Developing a process of filtering from a large collection to a handful of images to edit will make your life easier not just because it’s a mundane yet necessary task BUT because it’ll speed up your turnaround time for finalizing images for client delivery.
This is why a successful wedding photographer, for example, is able to increase their client load and thus, grow their business.
You’re talking thousands of photos from one day of shooting. And wedding photography is the type of photography where this is necessary so you do NOT miss out on potentially awesome but also important, once-in-a-lifetime photos.
Reducing those thousands of photos down to the absolute best and most necessary in a short amount of time is an important step if not the most important to get started in editing those wedding day photos.
That’s just one example but still, should also serve as a reminder that if you and I want to become great at photography, grow our business and develop our branding, we have to increase the number of projects we take on. And in order to complete those projects successfully, we have to become great at culling.
So yes, it’s a necessary evil but do-able.
It will just take a little bit of knowledge, practice and application. So best wishes to you as you develop your process. I’m sure you’ll have one down in no time.

This culling blog post is insightful and practical, helping me streamline my workflow with her clear approach. It’s made the culling process more efficient and enjoyable for me as a photographer.
Thank you for your feedback!