
Ah, here we are again with another Lightroom Classic tutorial blog post.
If you can’t tell by now, I love me some Adobe Lightroom Classic editing software.
Yes, it is subscription based so you have to renew your subscription every month or annually, but in my opinion, it’s worth it.
I have been using Lightroom now for about one year and I’m continually learning new things to help increase the efficiency of my editing workflow. It does help that they’re constantly tweaking and adding new or updating old features to help make a photographer’s job easier.
One of the tools that deserves a blog post discussion is that of the
Lightroom Before and After features.
This post may contain affiliate links, which means I’ll receive a commission if you purchase through my links, at no extra cost to you. Please read full disclosure for more information.
Sometimes it is not the coolest feature or the most unique features that deserve a mention but the feature that you use most frequently.
And this is one of them for any photographer editing their work.
So in this blog post we’ll be discussing the various ways to look at an original photo versus the edited photo of your images in Lightroom Classic.


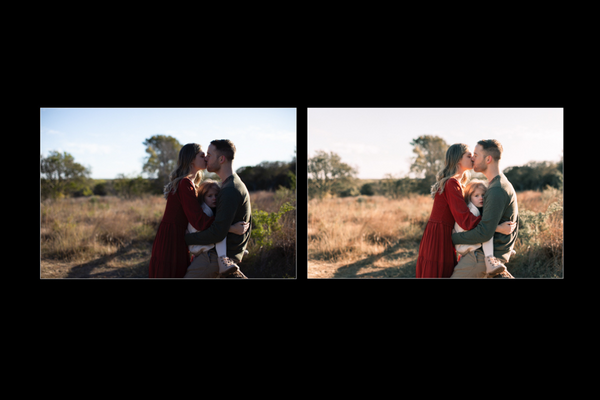
BEFORE
AFTER
If you’ve read my other blog posts, you’ll know why I’m such a huge fan of Lightroom Classic and honestly, view it as the only version of Lightroom that I will use. You can read more about the different versions of Adobe’s Lightroom photography editing software here.
But to save you that repetitive spill here, I’ll gently remind you that Lightroom Classic will be the basis of discussion in this blog post so you know what perspective I’m coming from.
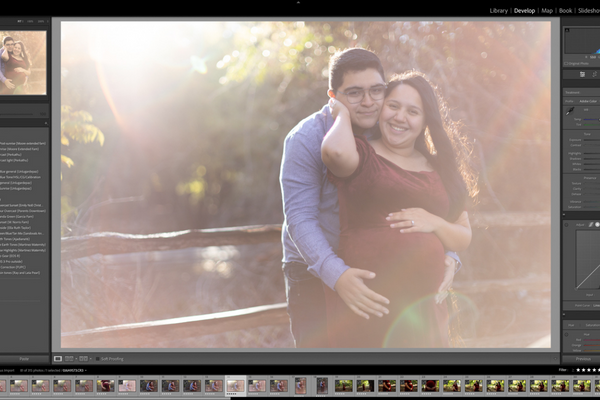
To start, we’ll be working pretty much exclusively in the Develop module.
If you need more information on what the Develop module is, you can read more in my article on Lightroom Tutorials for Beginners.
Backward slash
So within the Develop module where your access to Lightroom’s comprehensive list of editing tools are, you can easily switch from seeing your edited image to the original image by using the \ key (backslash key).
This is the Lightroom shortcut that I personally use the most when it comes to looking at Lightroom before edits and then after.
And for most photographers, it is the quickest way to see an edited version versus unedited version of your image as you endeavor through your editing flow.
Another great way to see a comparison is by pressing the F key.
This leads to a full screen view of your image.

Press F again to go back to the Lightroom editing view.
However, this does not allow you to see the unedited version in full screen unless you make a virtual copy of your unedited version. We’ll discuss how to make virtual copies below.
The Y Button
Now, the Y button is also a common method for these different view modes.
At the bottom left side of your center image display view, you’ll see two Ys side-by-side in the toolbar area. When you click on the down arrow next to the double Y icon, the dropdown menu will show you the different view options you can view of the different versions of your image for side-by-side comparison or top-down comparison. The different ways are as follows:
- Before/After Left/Right
- Before/After Left/Right Split
- Before/After Top/Bottom
- Before/After Top/Bottom Split
Again, you access these different views by clicking on the double Y icon.
There are also keyboard shortcuts for this that I’ll list for you below.
Now this is important to understand in case you want to understand how this works before you try it. For those that prefer to watch a video on how these steps work, you can skip to the summary video below.
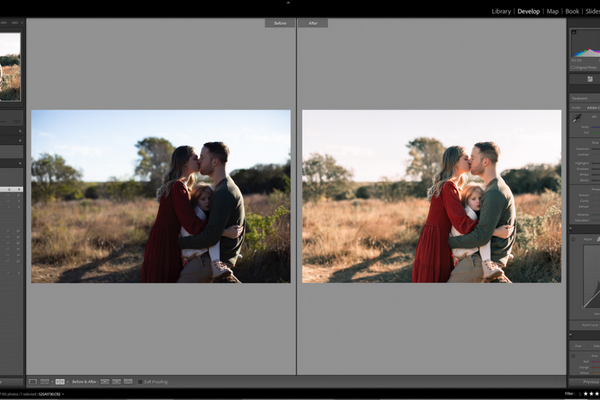
Before/After Horizontal Images
The first time you click, it goes to the first Before/After Left/Right view. This is a straight forward view of the Before image that is unedited next to the After image that has been edited.

Before/After Left/Right Split
In this view mode, the view is still that of horizontal images but instead of seeing a whole image comparison, the view is a single image split in half.
The split screen view shows the full screen image as the first half, the left half being unedited and the second part, the right side of it, being edited.

Before/After Top/Bottom
Similar to the Left/Right view, the Top/Bottom shows the before editing whole image at the top and the after editing whole image at the bottom.

Before/After Top/Bottom Split
Like the Left/Right split view, the Top/Bottom Split shows the single image split in half so it’s a top half to bottom view comparison.
The unedited part of the split image is at the top of the screen and the after editing part of the image is at the bottom of the screen.

To get out of the Y icon views, press the D key for the keyboard shortcut for Loupe view, and it’ll go back to just your single image in the image display area.
More “Before” options
What is awesome about this particular method is that you can change the Before image to reflect a prior editing stage and not just the raw unedited stage.
You do this by opening up the History panel on the same left-hand side, and drag any of the prior steps in the History panel to the “Before” image. You’ll then be able to compare a previous editing stage to your current edit of an image.
This is somewhat similar to the next feature we’ll discuss which is using Snapshot.
Using Snapshot
This feature is not commonly known by many photographers but is a great way to see before and after in Lightroom.
To be honest, I didn’t learn about it until I started reviewing my knowledge of these alternative options for looking at before and after images in Lightroom.
While in the Develop module, look at your left side panels. Under Navigator and Presets you’ll see something called Snapshots.
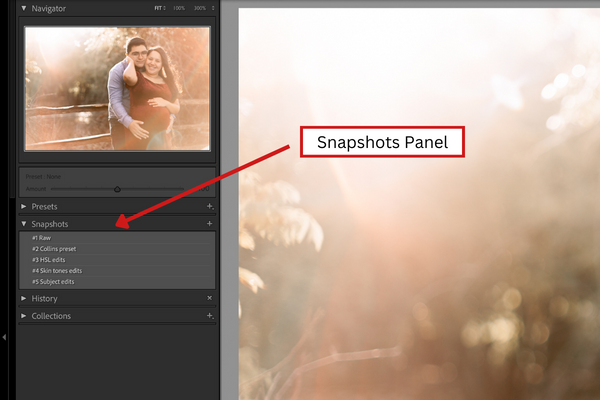
Within this Snapshots panel, you can use the + (plus) sign to take a virtual snapshot of your photo in its current state and preserve that version for you to compare to later on.
You can take a snapshot without any editing done, and then for each stage of your editing process.
For example, as you edit using the right-hand side panels starting with the Basic panel down through Calibration, you can take a snapshot of your photo in each of these stages.
Then you’ll be able to look at your current image compared to the last edit of whatever version you prefer.
You can look at each version by simply clicking on the phase within the Snapshot panel that you want to see.
This will bring up that particular image with the editing done at that snapshot status into your image display area.
Snapshot and the Y icon
Similar to selecting an editing stage in the History Panel to drag onto the “Before” image when using the Y icon, you can do the same with a Snapshot editing stage.
The first thing you’ll select is the double Y icon in the toolbar area, then right-click on the snapshot and select “Copy Snapshot Settings to Before.”
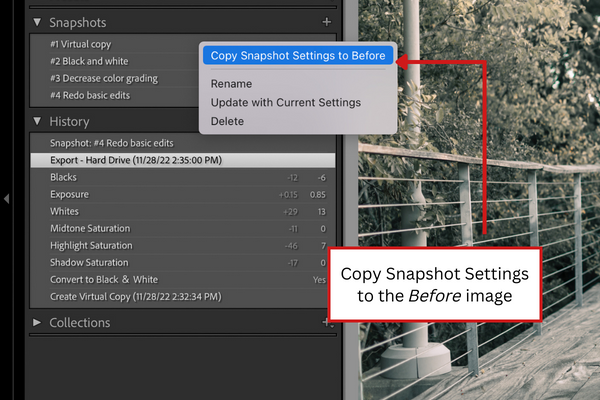
You’ll then be able to directly compare that particular editing stage from your Snapshot view in the Before image directly to your current After image.
To continue editing (*this is important to understand!)
To continue editing from your most current After image do the following steps.
#1 Start with looking at your history list in your History panel and click the last step prior to the first step that starts off with the name “Snapshot” (and whatever other title you gave it).
#2 Right-click on your mouse to pull up the menu options associated with the History panel, and select “Clear History Above This Step.” This clear history step will then remove all the Snapshot views you were just looking at within your History panel so you can continue editing where you left off at the most recent editing stage.
This method of looking at before and after of edited images allows you to see what you modified in the different editing panels of the editing process. It’s an excellent way to recall your thinking process as you edited a particular image.
Creating Snapshots after an Image is Edited
Similarly, you can still create snapshots after you’ve finished editing an image.
To do so, you’ll right-click the step in the History panel that you want to save as a before image. Select Create Snapshot and name it whatever you feel best so you can remember your thought process or editing stage later when you view it.
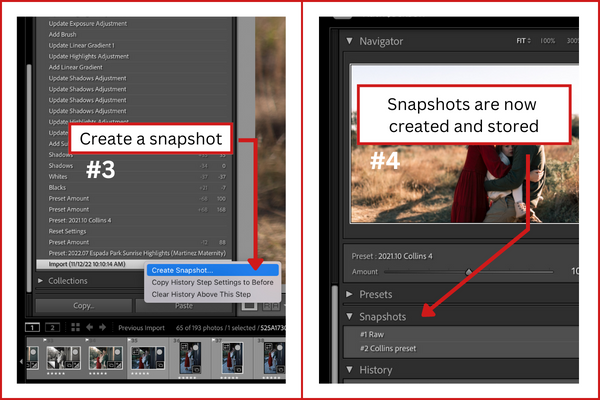
And boom! You have a before image of a stage somewhere in your editing process that you can now use to directly compare to your final edited image.
*PRO TIP
My recommendation would be to number your snapshots first and then name them appropriately so you can keep track of the stages.
For example, I’ll name my snapshots like so:
1 Raw
2 Name of preset applied
3 Transform
4 Basic edits
That way when I review my snapshots later, I know exactly what editing was performed to the image at each stage.
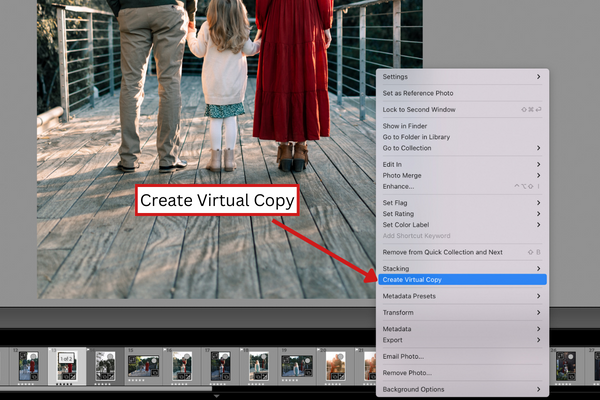
Virtual Copies
Another basic but quick way to see before and after is to create a virtual copy of your edited image and reset it to its raw form.
Let’s say you want to toggle back-and-forth between an edited final image and unedited image but don’t want to use the \ (backslash) key, for whatever reason it may be.
The first step you’ll need to do to create a virtual copy is right-click on your edited image and select create virtual copy. This will put an exact duplicate of your edited image next to your edited image. It will be named “Copy 1” and so on and so forth depending on how many copies you make.
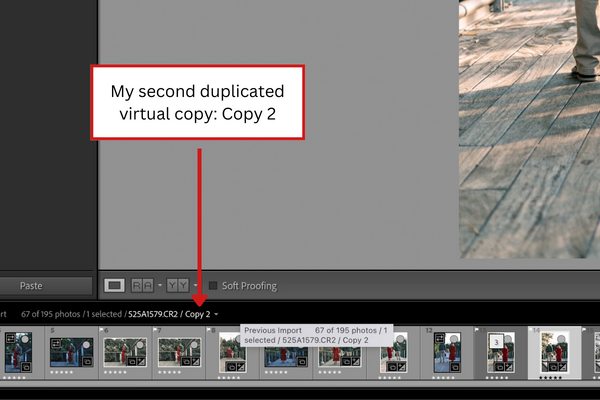
Then you will go the right-hand side panels and at the very bottom select the Reset button.
This will put your image back to its original state, raw unedited form and you can then use your arrow keys to toggle back and forth within the filmstrip to look quickly at the edited and unedited versions of your images.
Full screen view
Back to our discussion of the full-screen mode, once you have a virtual copy created of your raw unedited image, you can press the keyboard shortcut F key to go to full screen viewing and then toggle back and forth to see your edited image full screen.
Do this with your arrows on your keyboard which is essentially you going back and forth within the filmstrip.
Miscellaneous Lightroom Tips
Keyboard Shortcuts
Here are some lightroom keyboard shortcut keys that you will undoubtedly find valuable.
You can also access these and more by looking at the dropdown menu options up under the View tab while in Lightroom. There will a Before/After option that will show you more keyboard shortcuts
- Before image only = \
- Before/After horizontal comparison = Y
- Before/After Top/Bottom = Option/Alt + Y
- Before/After Split = Shift + Y
- Full screen = F
HUGE tip! Using the L key view
Now here is my bonus tip. I figured this out all by myself, thank you very much.
(Well, then after I looked up what the L key shortcut was, it all made sense).
Whatever view you’re in when you’re using the Y icon to compare Before/After images, press the L key which is the shortcut key for the Lights Out mode.
It dims all the working Lightroom panels surrounding your image display area so you can just see the image or images itself.
The first time you press it, it greys out all the surrounding panels of Lightroom.

Press it again and it completely blacks out everything so your Before/After comparison is the only view you can see.
It’s AMAZING!
Try it and see! It’s definitely changed the editing game for me!
To summarize, there are
So many ways to see Before and After in Lightroom.
The right option for you may take a little time to figure out if you want to go beyond the beginner stage to Lightroom expert.
One thing is for sure.
As a professional photographer you need to look at different images in their different steps of development.
Going back and reviewing edited images is important to track your progress as you grow as a photographer.
But if you go back and don’t remember what you did, what’s the point?
Using these deeper methods of Snapshot and Y icon comparisons will remedy this.
To end this tutorial, check out my summary video on these steps here below.
Video Tutorial: How-to-see Before/After in Lightroom
If you want a short quick version of how to see before and after in Lightroom, check out Lightroom Killer Tips. They keep it short and sweet!

yeah it was help full. i will mention your site on my site for good editing skill.
owner: https://thelrapp.com/how-to-edit-cinematic-photos-using-lightroom-mobile/
Thank you for the feedback, glad to hear it!