
This is something that I think most photographers ask but not out loud. AND this is something that I think a lot of photographers know about but don’t actually KNOW.
ISO stands for the numbers that are set as standards by the International Organization for Standardization.

“Errrr… whaaaa?!” You might be thinking.
I know, it almost seems redundant but that is what it means.
You see, ISO is the sensitivity of a camera’s sensor to light.
For old school film cameras, the camera’s sensitivity was noted and adjusted by this numbering system. Though most are more familiar with digital photography as opposed to film photography now, this same numbering system serves the same purpose, but for a digital sensor.
“Why does this matter?” You might be thinking.
ISO MATTERS.
You need to understand this camera setting because it separates the experts from the novices, the professionals from the amateurs, the real from the imitators.
Ok, let me calm down and not be so dramatic.
But seriously though!
Having a deeper understanding of ISO that takes you past automatic mode and the principle of “just keep it as low as possible” will help separate your level of photography skill from the oversaturated pact and give you an amount of control that will increase your ability to produce unique results.
So. Let’s break this blog article down into discussing these following 3 important points.
- Why is ISO important in photography?
- What are the best settings and how do we adjust the ISO levels?
- What examples can you give of how ISO affects your image?
PIN THIS ARTICLE!

This post may contain affiliate links, which means I’ll receive a commission if you purchase through my links, at no extra cost to you. Please read full disclosure for more information.
Why is ISO important?
ISO is important in photography because it is one of the three pillars in the exposure triangle.
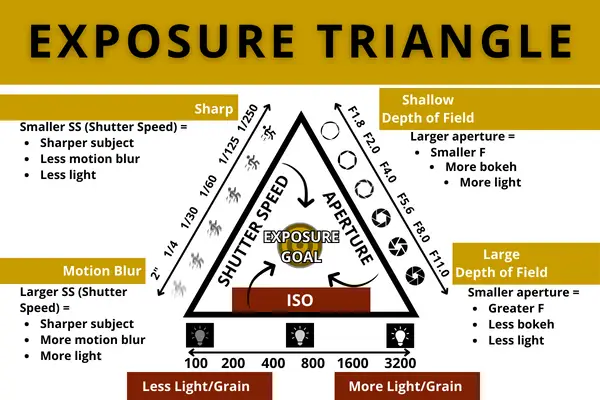
The three pillars of the exposure triangle are aperture, shutter speed, and ISO.
All of these settings form a foundation for allowing you a level of control for unlimited creative power.
How so?
Well, the exposure triangle is a concept that emphasizes the necessity of proper exposure of an image. That, my photography (and videography) friends, is the goal.
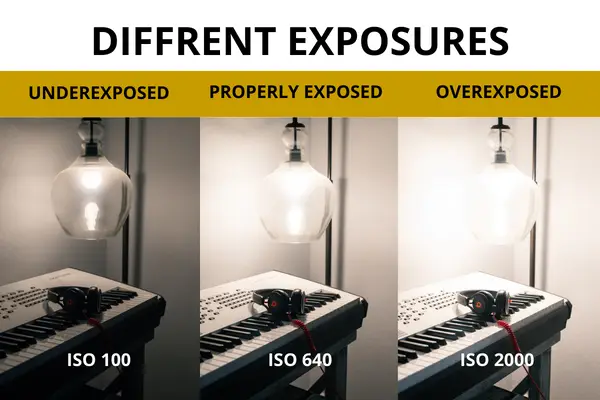
Exposure is affected by the amount of light that reaches the camera sensor to give you a properly exposed image versus an underexposed image versus an overexposed image.
- Properly exposed means the light level is just right.
- Underexposed means the light level is low.
- Overexposed means the light level is high.
All three of these pillars work together or against each other, depending on the settings, to help create the right balance when it comes to just enough light in your image.
ISO is the setting that controls the sensitivity of your image sensor to light.
This is the one pillar of the exposure triangle where the concept is literally straightforward. Meaning, to increase the image sensor of your dslr cameras or mirrorless cameras to light because you need more light in your image, then simply use higher ISO values.
On the contrary, if you need less light in your image, then simply use a low ISO setting.
There are no fractions involved or reverse concepts. It is that straightforward.
HOWEVER…
What are the best settings for ISO?
Let’s talk about the best settings for ISO and why that is so, and then let’s talk about the different camera modes to adjust your camera iso.
Why these ISO settings?
Ok, without dragging it out, let’s talk about what the best iso setting is.
The best iso setting is the lowest one that you can set your camera to, manually. I.e. not within auto mode. We’ll talk about why shortly.
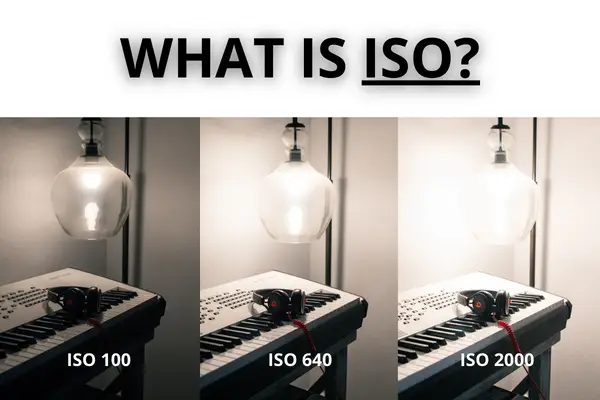
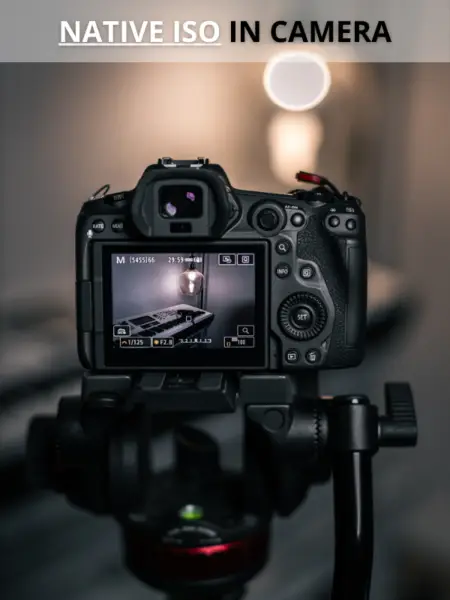
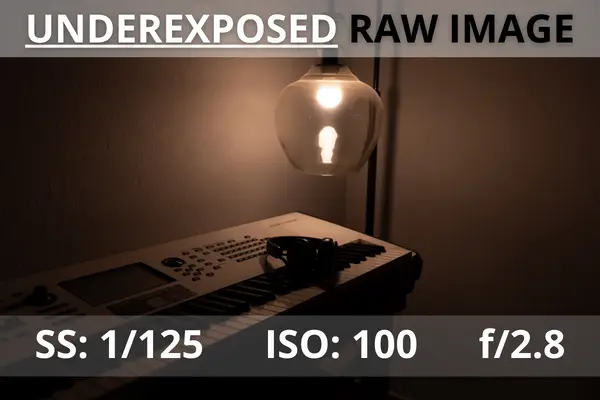
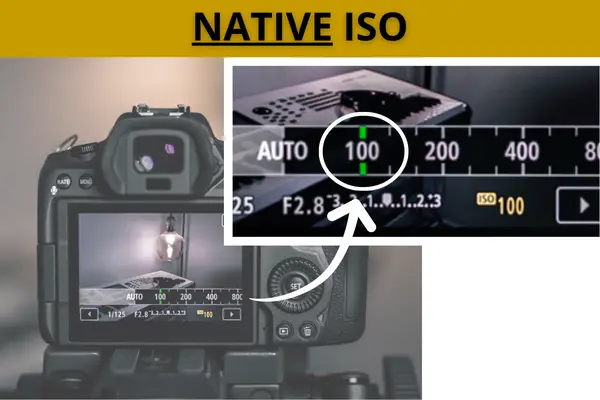
This ISO number is usually 100. For most cameras that is the lowest iso you can set the ISO sensitivity to. This is also known as the native ISO.
This is ideal because of the adverse effects that result from a higher ISO number.
A high sensitivity equates to high iso values. And while this seems easy to not only understand but also easy to use when it comes to needing more light for your image, high iso values correlate with the negative results of higher noise levels.
“Okaaaaaay? What is noise?” is what you’re probably thinking now.
Noise in photography is the amount of grain and distortion that is artificially produced in your image when using higher ISO settings.
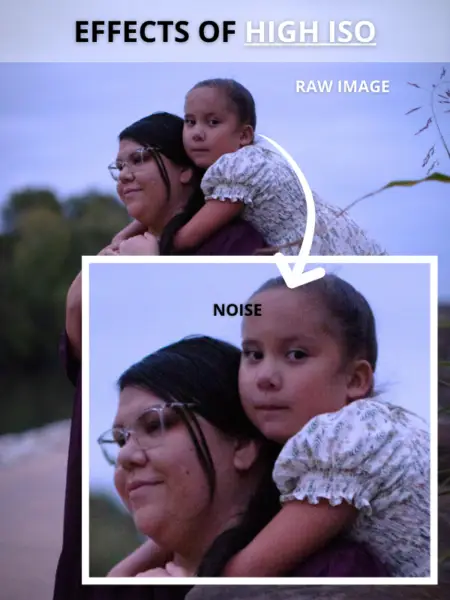
In old school film cameras, the grainy look is produced by this “noise.”
Nowadays, most of us photographers are using modern digital cameras. And no matter how modern or advanced we are, we still have the risk of having this similar negative effect of digital noise in our images particularly in low-light situations.
This abnormal artifact in our images can take away from our image by making it look old, less sharp and other various subjective effects of a low-quality image.
Unless, of course, you’re intentionally going for that look.
However, nine times out of ten, you’re going to want the best image quality for your photos and having the correct exposure is going to optimize that.
We’ve already talked about trying to keep your ISO at 100 for the best results.
BUT, there will be lighting conditions where this simply does not work and the ISO rating must be adjusted to increase the exposure of your image.
Typically, these are low-light conditions like low-light environments of night photography or landscape photography.
For these situations, there is no specific iso rating to know. It is simply using the lowest numerical value of iso standards to provide the best well-exposed image.
In other words, the lower iso settings that you can possibly use to get great exposure but less noise, is going to be the best iso setting to use.
Depending on the different low light conditions you will be in, different iso settings are going to work best.
The key to remember in this situation is that underexposed is best because you can recover a lot of details when editing.

So… how do we adjust ISO?
Well, you already know that a low iso value is the goal.
Increasing the ISO from 100 is going to produce a brighter image.
Yes, it’s that simple.
What you have to keep in mind is what your camera’s native ISO is. Native ISO is the baseline setting for your camera that will produce the best image quality and detail.
This setting varies based on different camera manufacturers, and can vary from brand to brand and model to model. But usually is the lowest ISO value on that camera.
This is important because most cameras have this setting as the lowest option available and this is what you should aim for when adjusting exposure of your image.
Particularly in manual mode, you’re going to want to know what this is so you try to keep that high ISO setting to the lowest it can be for your image exposure.
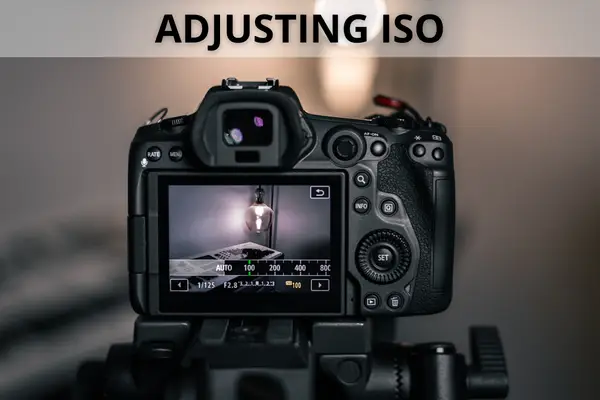
AUTO ISO
Now, you can also use auto ISO to adjust your ISO.
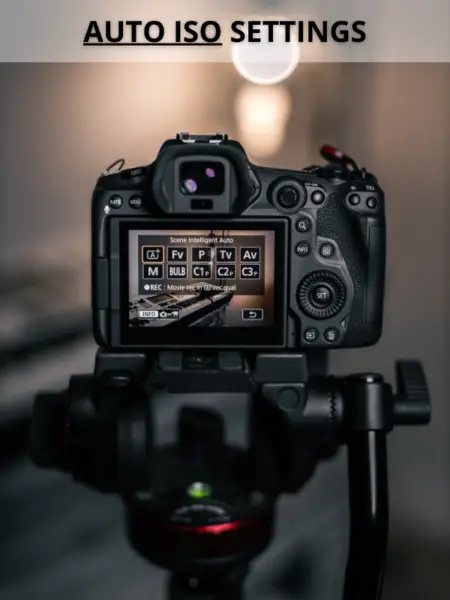
BUT… you should know by now, I do NOT recommend “auto” mode settings. Not in the 3 previous articles before this one, and most certainly not here either.
An automatic mode means the camera brain is doing the thinking for you. And it’s based off of whatever programming has been inputted to the system.
Shutter Speed and Aperture mode settings in camera can be used with auto ISO to automatically adjust your settings to try to balance the noise in your image for you.
You can learn more about Shutter Speed and its role in the exposure triangle, by reading my blog on What Is Shutter Speed In Photography?Understanding aperture is just as important which you can learn more about in What Is Aperture In Photography?
BUT…
These are not perfect and will reduce creative control from you as a photographer. They are inaccurate and will produce less than optimal results that will even limit the depth of your post-editing power after the fact.
There are some things you will not be able to correct.
So my recommendation is to just use manual mode.
Quite simply, the right iso setting is the lowest iso you need to produce the best exposure for your image. Yes, you’ll have to balance adjustments with the other 2 pillars of the exposure triangle to do so but practice makes permanent and you’ll be able to do so with ease, no matter the lighting condition if you practice, practice and practice.
Examples of the Effects of Different ISO Settings
Different ISO values will be optimal depending on the lighting conditions of your environment and the settings of the other two pillars in the exposure triangle.
Remember, there is ISO, aperture and shutter speed.
SUNNY DAYS
Let’s take a sunny day, for example.
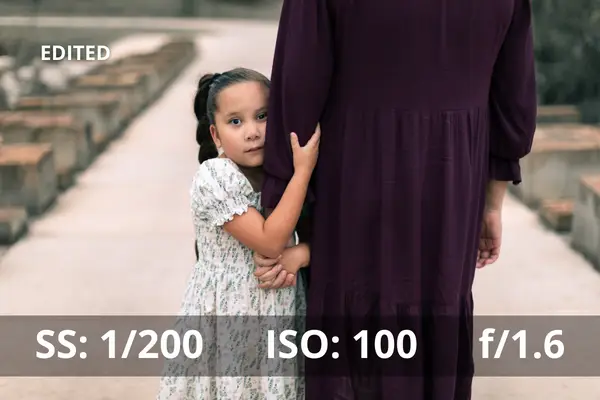
If you’re doing a shoot outside on a sunny day, you’re going to be in the best condition when it comes to your ISO setting. With all that available light readily coming into your camera sensor, you’ll be able to leave your ISO at 100, which is the lowest setting possible for most camera models.
Leaving digital ISO at 100 means you’ll need to adjust your other settings of aperture and shutter speed to obtain the best exposure of your image.
In a sunny setting, this typically means your image is likely readily overexposed. In other words, too white.
Leave your ISO at 100
Leaving ISO at the lowest setting of 100, and adjusting the other two settings, you’ll likely need to balance having a small aperture (a smaller opening to allow light through) and a fast shutter speed, or quicker, shutter speed.
A smaller aperture which means a higher f-stop number, will decrease the size of the lens opening to decrease the amount of light coming through.
A higher, faster shutter speed means the shutter closes quicker, limiting the amount of light coming through.
The light “coming through” is what hits your camera sensor to expose your image.
By using these settings, your image will be of high quality with no distortion or artifact or noise in your image!
Now, you are going to give up some bokeh and motion blur in the process, but you get to control how much.
To offset this, you can use ND filters such as those by Polar Pro, for your camera lens which will help limit the amount of light your camera sensor is exposed to.
LOW LIGHT SCENES
Now, let’s talk about low light situations.
This, my friends, is where things get tricky.
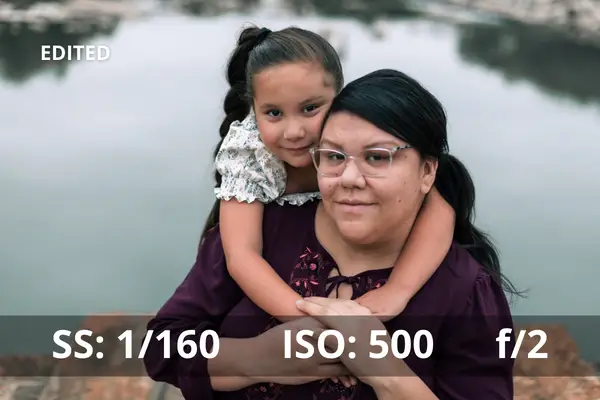
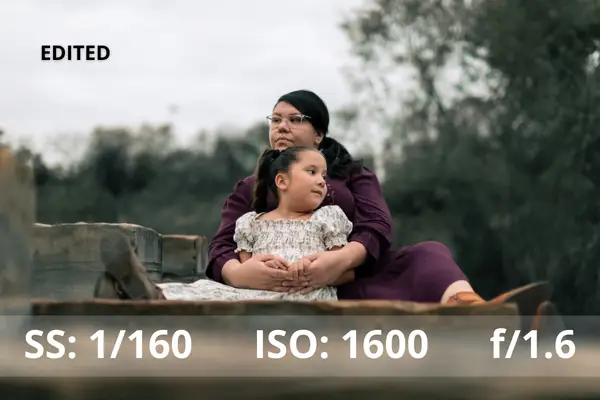
In low light settings, like night photography and astrophotography or even sunset or dusk lighting conditions, you are going to be forced to adjust your ISO.
Let’s talk about the exposure triangle elements in these conditions, starting with aperture. It does not matter how big your aperture size is for your lens, it’s not going to be enough to bring in enough light to expose your image.
Now, when it comes to shutter speed, you will likely have more room to play with to increase the amount of available light let in. However, remember that shutter speed not only affects exposure but also motion blur.
So, the slower your shutter speed, the higher the motion blur in your image. Even a tiny bit of camera shake by pressing the trigger button can introduce motion blur at a slower shutter speed.
But if you’re still trying to use shutter speed to help expose your image and reduce the increased ISO settings, use a tripod.
There are certain pieces of equipment that will help you use shutter speed in conjunction with ISO to have the best settings to reduce artifact and noise in your image in these low light conditions.
- Remote trigger
- Tripod
- Adjust your menu settings to use a timer or intervalometer
- Bring your own small light source like a lume cube
BUT, despite these additional accessories, you’re still likely going to have to increase your ISO.
In this situation, increase your ISO to the lowest level possible to achieve the exposure you need. It sounds counterintuitive and somewhat confusing, but I promise it makes sense.
Let me rephrase in another way.
Your maximum ISO should be the lowest possible that you need to achieve the necessary brightness to your image.
The reason for this is to keep the amount of noise introduced into your image at the lowest possible level.
Little to no noise increased the quality of your image. Making it sharp, as opposed to grainy and blurred.
Here are some examples of ISO settings in low light environments.
Editing Adjustments
Now, a way to offset the noise produced by higher ISO levels when images are taken in low light conditions, is by using a noise reduction tool in your editing software.
With the advances of AI technology nowadays, my software of choice, Lightroom Classic, has incorporated this as part of their standard tool set option available in editing. Which, if you’re new to photography and editing software, check out this article on Lightroom Classic Tutorials for Beginners. It’ll give you an overview of how Lightroom works and hopefully spark your interest in trying it out.
I absolutely love this feature. BUT the key is to use as little as possible to keep your image looking real as opposed to abnormal or fake.
This setting is usually around 20 in Lightroom.
Let’s summarize: ISO in Photography
To wrap up this final chapter in this 4-part series of basic principles in photography that you must know as a beginner, ISO is the setting that you need to understand but need to adjust the least.
In a way, this kinda makes things easier as a photographer.
Especially if you’re starting out, your goals should be to aim for the lowest ISO setting if not 100, and focus on learning how to adjust the other elements of the exposure triangle to achieve the best exposure possible.
BUT, you definitely should take time to learn about ISO and when it’s important to adjust and how to adjust it in concurrence with shutter speed.
This, my friends, is the simplest in the exposure triangle to learn!
In my opinion, at least.
If you have made it this far, then all you need to do now is start practicing. Test out these concepts. Get out there and shoot.
And if you need another perspective on ISO, check out this article by I Hit The Button on What is ISO in Photography?
Practice makes permanent! The more you apply your knowledge, the better you’ll become.
You can do it.
