

“What is the best time of day to take photos?”
is one of the commonly asked questions I hear from my clients.
While so many different times of day can work, there is a coveted time of day by most if not all professional photographers.
We’ll dive into this discussion and give you examples of how to make these times work best for you, whether you’re a client or photographer.
As for that ideal time, let’s start there. With golden hour.
This post may contain affiliate links, which means I’ll receive a commission if you purchase through my links, at no extra cost to you. Please read full disclosure for more information.
Golden Hour
First, what is the definition of golden hour?
Golden hour is that window of time typically one hour after sunrise and one hour before sunset.
It is also known as the magic hour and truly, magical footage can be captured in this time frame.

Buuuuuut that may not be the case always, especially if the sun isn’t quite working with you that day.
So essentially, there are two opportunities in the day for golden hour. Preference is dependent on the person. As a videographer and photographer, myself, I prefer sunrise golden hour.
From my experience, I feel like there are more opportunities to capture magical footage as the time extends past golden hour in the morning.
For that reason, I prefer sunrise golden hour photography over anything. Not to mention, there are typically fewer people around at popular locations compared to sunset.
This makes it easier to re-position clients for that perfect lens flare without being pushed to capture a shot because people are trying to walk by or walk behind or in front of your shot.
This usually holds true for popular photography sites around town and weekends, when most outdoor photos take place.
However, sunset time is my most booked session. It just happens to work for most of my clients’ schedules and thus is a timeframe I’ve come to favor as second choice.
Either way, golden hour light in the morning or evening is always, always a great time of day to shoot.
Quality of Light
What photographers love about golden hour is the quality of light during this time. Especially if you prefer natural light as opposed to flash photography (*cough, also your girl here), golden hour is perfection for soft light ambience.
As opposed to harsh light in the middle of the day, soft light provides even lighting, minimizing harsh shadows on the subjects at hand. It’s more flattering as well, and even the little things matter like your clients not squinting for photos.
Also, the possibility of capturing a gorgeous sun flare is high in golden hour. This is the potential “magic” that golden hour times provides.
This brings up the argument of sun flare versus lens flare.
Some argue that a sun flare is different than a lens flare whereas most use the term “lens flare” interchangeably with the concept of a sun flare.
You can read more about the concept of lens flare in photography by Digital Photography School.
A sun flare is considered to be when the sun’s rays provide a starburst shape in your image. A lens flare is when the sun as the strong source of light is caught by your lens in a way that scatters the light, resulting in artifacts in your image.
Personally, I view them as the same thing and typically use the term “sun flare” more when trying to describe the effect to my clients.
However, because lens flare photography is more appropriate to use, we will stick to this term here.
Besides the argument of lens versus sun flare, there is a division amongst photographers for those who pursue lens flare versus those who try to avoid it altogether.
This is why you’ll see some photographers heavily using their lens hood versus others who don’t. Some do not like the artifacts that can be produced by the light hitting your sensor at certain angles and producing those flares.
But also note, this can be an oversimplification of the argument which for the sake of this post, is all that is needed. Perhaps we can delve into different types of lens flares later.
All you need to know is that a lens flare can be magical if it’s positioned perfectly and used the right way.
And one way to capture those moments the most is in golden hour.
Blue Hour
Now blue hour is a timeframe many people are not familiar with but can be ideal depending on what photography session you’re going for.
Blue hour occurs when the sun is just about to RISE or has just set. The sky exhibits this deep blue color and even the landscape is bathed with this blue light.
But unlike its name, blue hour typically last 20 to 30 minutes before sunrise or following sunset. It can also last shorter as well depending on the season and geographical location. And it may not be “blue” depending on the weather that day.
For example, a few days ago I went out for the sole purpose of capturing some blue hour long exposure shots off one of the main highways here in San Antonio, Texas.
When I looked up the blue hour time, it being mid-October 2022, the blue hour gap was only about 10 minutes from 7:12 AM to 7:22 AM. So if you’re planning to shoot during blue hour, pay close attention to the time blue hour is estimated to be on the day you’re looking to shoot.
This article by EarthSky breaks it down quite easily.
That day the weather was overcast and I didn’t get much of a blue light effect, BUT I still got these beautiful moody shots. Check out the before and after below.


As for the type of outdoor photography, blue hour is the ideal time frame for landscape photography or night photography.
Manual Settings
A photographer with knowledge of manual control of their settings for long exposure (amongst other settings) can capture unique images in blue hour.
Using a tripod to help avoid any unintentional motion blur even by pressing the capture button, can be extremely helpful for this type of photography. For example, to capture light streaks from moving cars while keeping a building in focus (during blue hour cityscape photography), you’ll need to have a slow shutter speed.
Slow shutter speed means the fraction is greater as opposed to smaller. For example, 1/10 as opposed to 1/200. The 1/10 allows more light in, whereas the 1/200 does not.
At a 1/10 shutter speed, the camera’s sensor is exposed to light longer than the 1/200 shutter speed and the result can be amazing especially when you have moving objects providing light.
Benjamin Jaworskyj has a great video explaining shutter speed. Check it out.
This skill takes time and practice but once you’ve experienced it, it can become addicting and provide unique photos that not many can reproduce.
Worst Times of Day for Photos
High noon where direct sunlight can be the worst time of day for photography.
When the midday sun is directly overhead, the resulting harsh light can cause unflattering shadows on your subject’s face. This is where issues like raccoon eyes (dark shadows underneath the eyes) can appear in portrait photography.
You can see an example below of a photo taken near midday or high noon. While the photo was still great, in the editing phase I had to work on lightening the facial shadows to decrease the harsh shadows that resulted from the direct sunlight.

These are the times when direct sunlight is most prominent and the resulting lighting conditions difficult to work with.
This is not always true though.
This can happen during other times of the day as well. Like a very sunny day can result in direct sunlight issues and harsh light conditions throughout the day as opposed to just midday.
Professional photographers who know how to work in these less-than-ideal lighting conditions can still produce stunning outdoor portraits or landscape photos, which is why for important shoots like a wedding day, it would benefit the clients to book a professional wedding photographer as opposed to someone getting started in order to save costs.
Those are memories you do NOT want to lose out on!
How Photographers Work with Harsh Lighting Conditions
Outdoor photographers will know how to position their subjects for the best lighting, using open shade to provide even lighting on the subject or adjusting their manual camera settings to best optimize post-production editing conditions.
Even the type of equipment that your photographer uses can help produce better conditions despite direct sunlight lighting.
Using equipment like filters over their lens, the lens hood and even reflectors can be helpful as well when it comes to creating great light from hard light.
Using Reflectors
Reflectors are a great way to redirect light as it reflects it depending on the way you hold it or aim it. This can be great during a midday photo shoot where the harsh light from the sun creates shadows underneath the eyes, nose and chin.
Depending on the color and position of the reflector, it can create a great fill light for your subject or even a negative fill light to create shadows. You can even use it to help create shade.
Digital Photography School has another great article that breaks down on how to use a reflector in various scenarios and various ways. It’s worth a read if you’re interested!
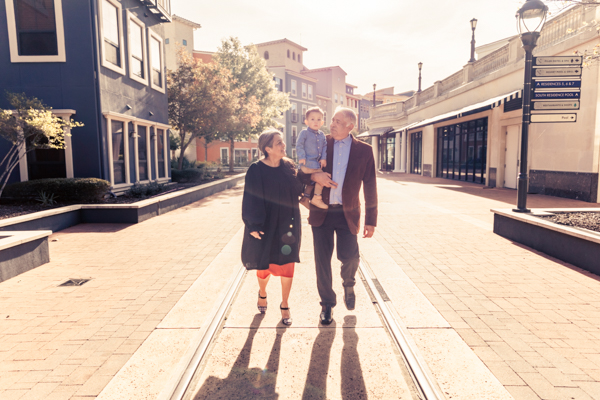
Late Afternoon (and Early Evening)
Late afternoon is one of the great times of the day to shoot as well. This time of day can work for many types of photography and in different settings, from portrait to landscape, indoor to outdoor.
Especially outdoor, the sun light is not as harsh, reducing blown highlights and harsh shadows. Knowing how to position your subjects for portrait photos, using any cloud cover and shade to help create a warm light effect can produce stunning photos during this time of day.
One way to tell if it is late afternoon is to look for long or deep shadows. This can also happen in the early morning as well.
Cloudy Days
One of the best times of day for photography that can vary with cloud cover and the weather are overcast days.
This can happen at all times of the day. Sometimes during a sunrise shoot I’ve encountered a completely overcast sky. While this can be a little disappointing because my clients and I are missing the potential magic of the first golden hour of the day, it is the next best thing because the clouds provide an even, diffuse and soft light source.
I’m not having to worry as much about trying to angle my subjects a certain way for the best lighting, or rushing to get certain shots before the light changes. I have plenty of time to take even better pictures in this type of ambient light.
This is an example of exactly that. We took these in the late afternoon, early evening time going into sunset golden hour. But because it was overcast all day, the cloudy skies created an even diffuse, soft light that minimized and softened any shadows.
Night Photography
Photography that takes place at night time provides an interesting take on subjects compared to day time photography.
It is challenging because the photographer needs to know how to control their settings for the best exposure and focus.
This type of photography usually is for cityscape and architectural photos.
Using equipment similar to blue hour photography, like a tripod, will be essential since the shutter speed will be greater than during the day time photography, and reducing any extraneous shaking will be essential for a still shot.
Also, knowing how to work with flash (flash photography) will be a tremendous asset in this type of photography since a light source will be essential to capturing quality footage in darkness.
Digital Photography School has an article on this as well that is a fantastic read if you’re a photographer looking to expand into this style of photography.

The Best Time of Day for Photos can be anytime.
Truly.
It depends on your photography goals, whether that be as a client or as a photographer.
The key will be having a photographer that knows how to work with natural light or the lack of natural light at whatever time of day that might be.
This is why I firmly believe working with a professional photographer is vital. If you’re going to invest finances into the shoot, you might as well make sure you get the most bang for your buck and not throw those precious pennies down the drain.
And it’s not just a matter of having a photographer experienced at shooting during these various times of the day but also knowing how to edit in post-production.
For example, taking a photo from unedited to edited can be just as important as knowing how to shoot in that particular time of day. In this example, this shot of San Antonio was taken at dusk.

In order to have the best results following editing, I knew during the shot I’d have to keep my ISO as low as possible. ISO is that artificial light you can pump into your camera during low light shots but also can result in a grainy and blurry photo.
And with the Mavic 2 Pro drone as my camera vehicle of choice, I knew increasing the ISO so I could see the shot better as I was taking it would make it worse in post-production. So when I took this shot, it was incredibly difficult to even see what I had taken. I just knew I liked the position and to make sure the ISO was low.
The result after editing was incredible and to date is one of my favorites I’ve taken early on in my career.
That example is to show you that there are no excuses for taking poor quality photos.
Clients, you deserve the best.
Do your research on your photographers. Check out their portfolio for previous work examples and know what time of day you would consider to be the best time of day for your desired photo session.
And photographers, grow, grow, grow.
Expand your knowledge. Practice at different times of the day to get well-rounded at shoot in any time of day. Read blog posts like this, and then go out and shoot.
Work on your editing. Read more about camera setting tips to put this into practice.
Don’t worry, I’m doing the same myself. This is one of my goals for these blogs. And that is to provide you with real-life experience on photography tips and tricks that I’ve learned and use myself.
If you do that, you’ll get awesome photos at any time of day and not just the considered best time of the day.
